
Mini diplomatici
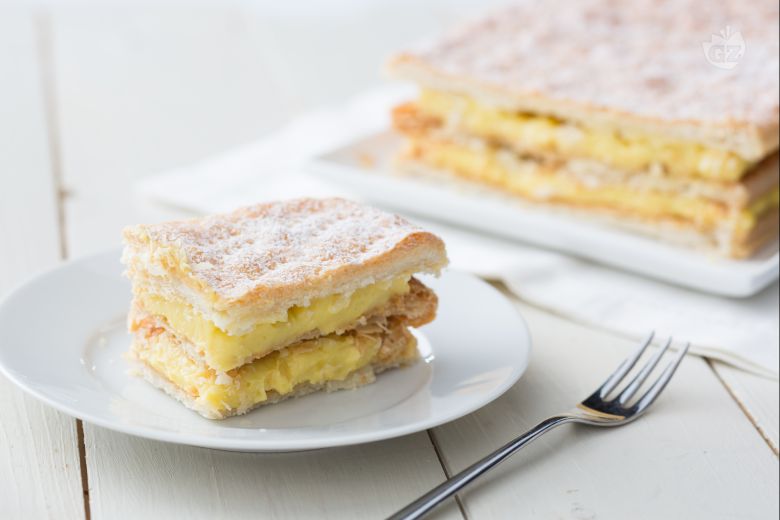
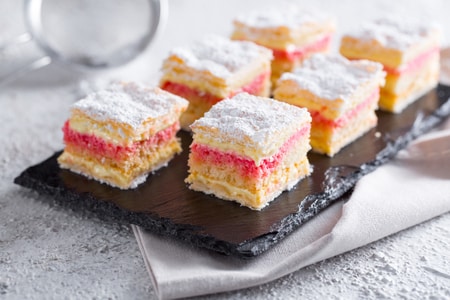
Mini diplomatici are a miniature version of the cake of the same name. Made with sponge cake, puff pastry, diplomatic cream, and Alchermes!
- Easy
- 1 h 45 min
- Kcal 329
Among the most popular cakes for birthdays, graduations, and many other occasions, there is certainly one that is always appreciated by everyone: the millefoglie cake! Crisp layers of puff pastry stacked on top of each other give a special crunch, and combined with a velvety vanilla cream, they make the palate happy. A traditional and timeless sweet of French origin, also known as Napoleon in the rest of Europe. And it is precisely thanks to its simplicity that it satisfies everyone's taste, but it can be customized according to each occasion with berries, strawberries, or chocolate chips! Let's discover together the recipe to prepare the millefoglie dessert, how to caramelize it, and how to fill it!
Here are other ideas not to be missed, to make a delicious millefoglie:
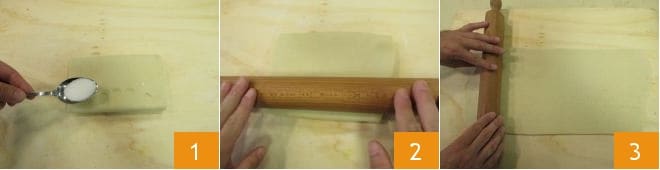
To prepare the millefoglie, first, make the puff pastry. Once it has rested well, you can roll it out. Instead of using flour to roll out the dough, use granulated sugar. Sprinkle the dough block with sugar 1 and start rolling it out gently with a rolling pin 2. Then turn the dough and continue rolling it out 3.

Once you have rolled it out enough, continue to roll it out lengthwise only, paying attention to the corners. Try to make an exact rectangle to get a more precise cake, always using sugar. You need to get a rectangle of about 23x10 inches, 1/8 inch thick 4. Gently run a hand under the dough 5 to let air in and help it relax; then let it rest on the counter for about 5 minutes. When it is totally relaxed, you can cut it. You should get three rectangles of equal size 6.
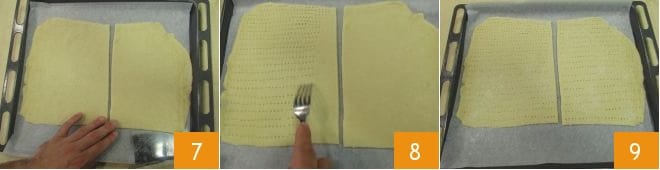
Transfer the rectangles to two baking sheets lined with parchment paper 7 and before baking, prick the dough with a fork 8 9. Place both trays in the center of a preheated oven at 375°F and bake in static mode for 15 minutes. Then lower the oven to 340°F and continue baking for another 35 minutes; this way, you will dry out the dough inside and get a well-caramelized result. Check the baking from time to time as it may vary depending on your oven. If necessary, you can swap the two trays halfway through baking.
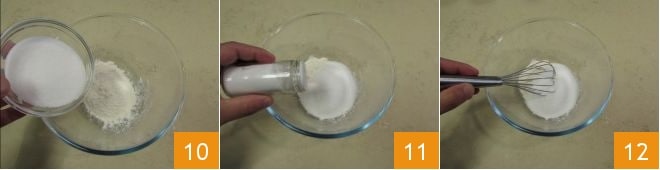
In the meantime, prepare the vanilla cream. Pour the flour, sugar 10, and a pinch of salt 11 into a bowl. At this point, mix with a whisk 12: this will prevent lumps.
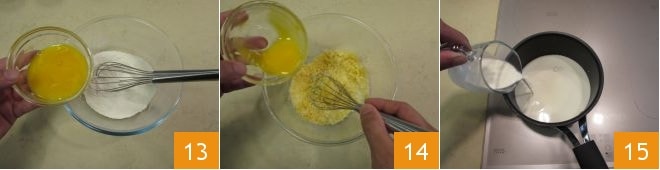
Add the egg yolks a little at a time, always stirring 13 14, and continue until all the yolks are incorporated. Stir vigorously until you get a smooth batter. Now heat the liquids. Pour the milk and cream 15 into a saucepan.
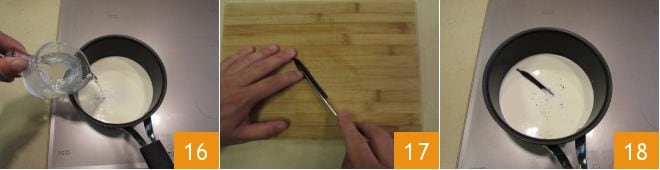
and the water 16. Split a vanilla bean lengthwise and scrape out the seeds from one half 17, then add both the seeds and the emptied pod to the saucepan 18. Heat everything without bringing it to a boil to avoid a thermal shock to the eggs.
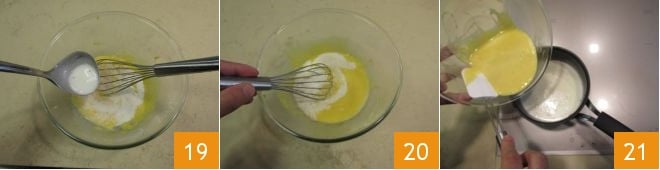
Pour a bit of the hot liquid into the batter using a ladle 19, then stir with a whisk to temper it 20. Then pour everything back into the saucepan, always stirring with a whisk so the batter doesn't settle at the bottom and cook too quickly 21.
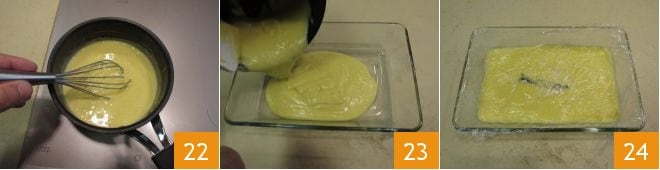
Keep stirring with the whisk until it thickens 22, making sure to go along the edges of the saucepan to prevent the cream from sticking. It will take a while because the flour gelatinizes when it reaches 194°F. Then pour the cream into a shallow and wide dish 23 and cover it with plastic wrap touching the surface 24; this way, a skin will not form on the surface. Let it cool in the refrigerator.
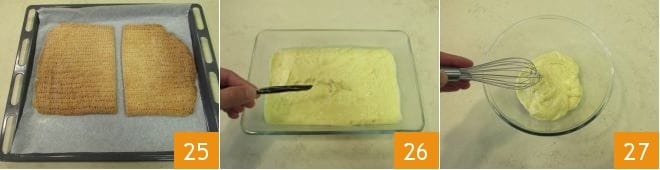
At this point, the dough will be cooked, and you can take it out of the oven 25. Once the cream is cold, remove the vanilla pod 26 and transfer the cream to a bowl. To make it smooth and shiny, quickly stir it with a whisk 27. Then transfer it to a piping bag without a nozzle.
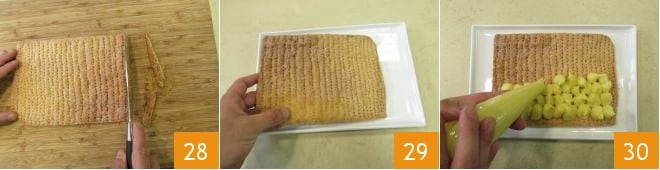
Now you just need to assemble the cake. Transfer the first rectangle of dough to a cutting board and trim it with a knife to get more precise edges 28. Then transfer it to a serving dish 29 and take the cream. Make tufts all over the surface, leaving the outer edge free 30; this way, you can be sure that the cream won't spill out with the weight of the other layers.
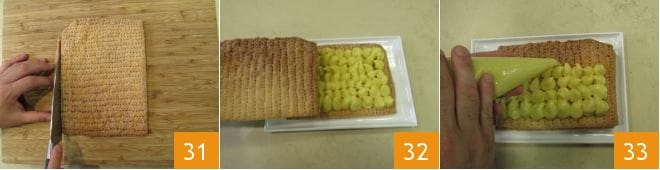
Then trim the second layer of dough 31 and place it on top of the cream 32. Then, again with the piping bag, arrange the cream as before until you use it all up 33.
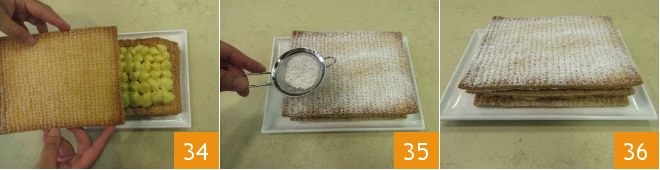
Take the last layer, trim it as done before, and place it on top of the cream 34. Sprinkle with powdered sugar 35 and serve your millefoglie 36.