Pizza napoletana
Learn how to make true Neapolitan pizza with simple ingredients and traditional techniques. Get the perfect blistered crust and airy dough at home!
- Difficult
- 1 h 5 min

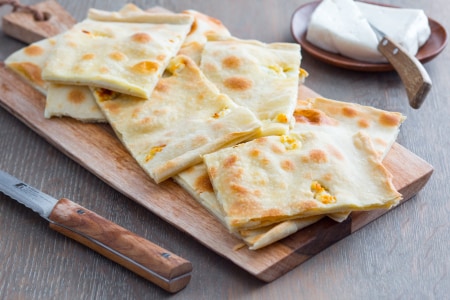
Pizza, focaccia, flatbread, bread... the only one missing was her: the Roman pinsa! The pinsa is a delicious recent invention, a successful leavened bread that has been trending in restaurants and bakeries, in the Capital and beyond! It is a very hydrated dough, with long fermentation (you will need to be patient, and the more patient you are, the better the result will be!), made with a special flour mix: durum wheat flour, rice flour, and soy flour. It is given an oval shape, pre-cooked, and then topped as desired... the legendary and timeless Margherita? Broccoli and sausage for gourmets? Parmigiana for the ravenous, or a gourmet version with mortadella, pistachio, and...? The choice is yours, the more flavors you have, the more enjoyable it will be to share the pinsa at the table!
Also try: Roman pizza and white Roman pizza, a specialty with mortadella!
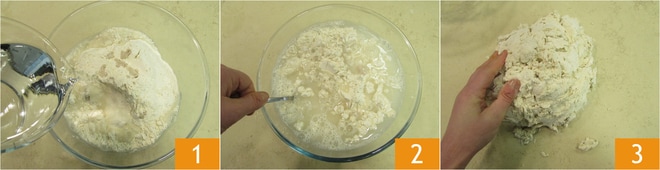
Before starting the pinsa dough, the water needs to be refrigerated: it must be very cold. In a large bowl, pour the pinsa flour, then the crumbled fresh yeast. Gradually pour in 24.6 oz of water 1 and mix with a spoon 2 until fully absorbed. Transfer the dough to a work surface, without flouring, and start kneading 3. Do not worry if the dough seems very rough initially.
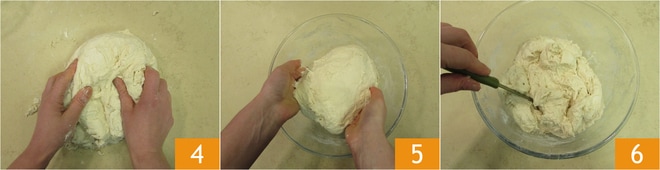
Do not rush, and you will see that handling the dough will become smoother and more compact 4. Transfer the dough to a bowl 5 and make 3 incisions with a knife 6: this operation helps the absorption of the other ingredients to be added.
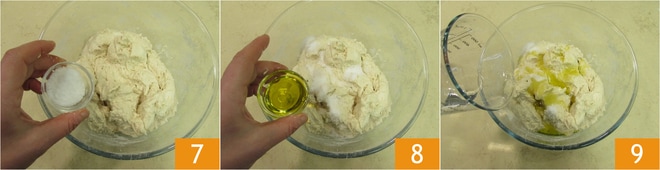
Then add the salt 7, the oil 8, and the remaining 1.8 oz of cold water, which should be added gradually 8, while continuing to knead.
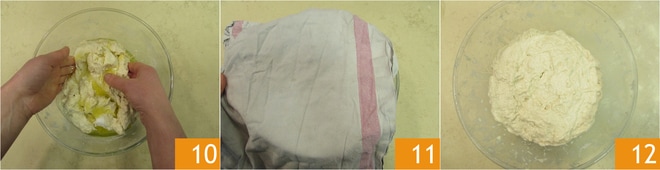
Continue to knead manually in the bowl for a few minutes 10 to ensure proper absorption. You can also transfer to the work surface and give some reinforcement folds if you prefer. The dough will already be smoother. To make it even smoother, you can leave it in the bowl covered with a kitchen cloth 11 for 15 minutes. After the indicated time 12
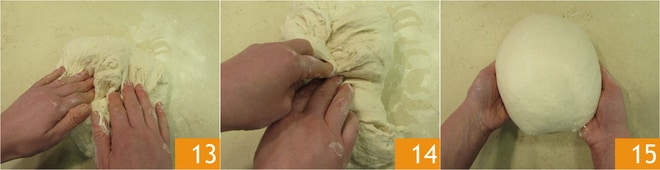
sprinkle the work surface with a little pinsa flour. Turn the dough onto the surface and make folds as follows: take the edge of the dough and bring it towards the center 13. You will see the dough start to become smoother 14. Then flip it and form a ball, rolling it on the surface to seal the closure well 15.
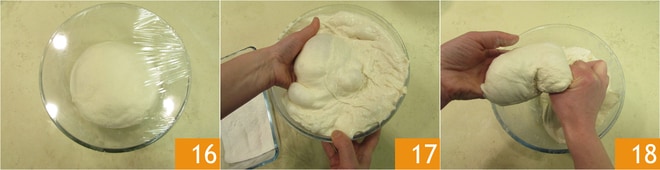
Transfer the dough back to a bowl, this time oiled. Cover with plastic wrap 16 and leave at room temperature until it doubles in size, about 2 hours. Then, transfer to the fridge for 24 to 48 hours. When you take it out, it will be very puffed and airy 17. Prepare a bowl with some semolina. Then, with slightly damp hands, take portions of dough weighing 8.8-10.6 oz. You will need to do this by "choking" the dough. Lift a part of the dough from below with one hand and cut it with the other, almost like mozzarella 18.
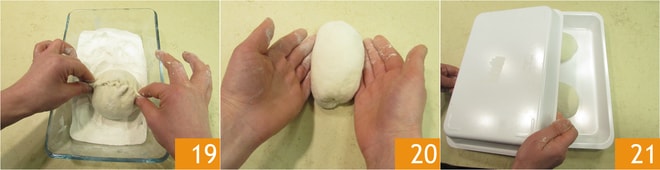
Transfer each piece of dough with the smooth side onto the semolina, then close each dough ball: make a fold by bringing the edge closest to you towards the center of the dough, repeat the same operation with the opposite edge, then pinch as if to create a seam with your thumb and index finger 19. Then turn the dough ball 180°, and again, fold the lower edge towards the center, fold the upper one, and close again by pinching with your fingers. Take the sealed portion, flip it onto the work surface, and rotate with both hands 20, using rotational movements towards you to ensure the part sealed with your thumb and index finger closes even better. Place the dough ball on a tray, with the smooth side facing up. Continue in this way for the others; you can use containers for rising or large baking dishes that you can seal well with plastic wrap. The portions should not be too close 21. It will take about 3-4 hours at room temperature for them to double in size.
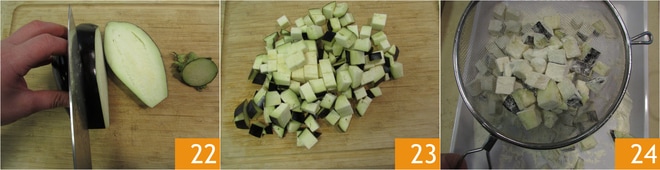
When it is almost time to roll out and bake the pinsas, you can prepare the ingredients for the topping. We will show you how to make the "parmigiana" topping. Wash and slice the eggplants 22, then cut them into cubes 23 and coat them in flour, then remove the excess flour by sifting 24.
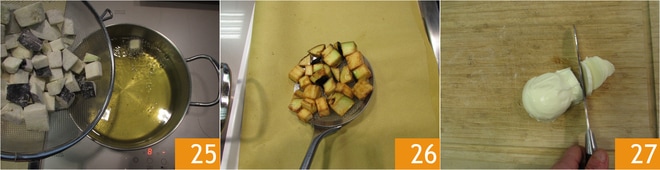
Fry in hot oil (at 338°F measured with a kitchen thermometer) 25 until golden. Then drain them onto a tray lined with paper towels 26. Prepare the tomato sauce by adding only a drizzle of oil and salt (if you like and to taste), then cut the mozzarella 27 into strips. If you want to bake the pinsa so that it is crispy outside and soft inside, you can use a baking stone and heat it in the oven (in grill mode at maximum heat) for 1 hour.
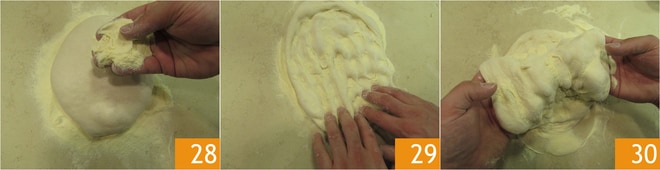
After the final rising time of the dough balls, take one and place it on a work surface sprinkled with plenty of semolina. Sprinkle semolina on the surface as well 28. Starting from the edge closest to you and moving up, or the top edge moving down, gently press with your fingers to flatten the dough. You should press with your fingers almost parallel to the work surface 29, gradually distributing the air across the dough. Give it a rectangular, oval shape as much as possible. While lifting the dough gently, try to remove excess semolina 30.
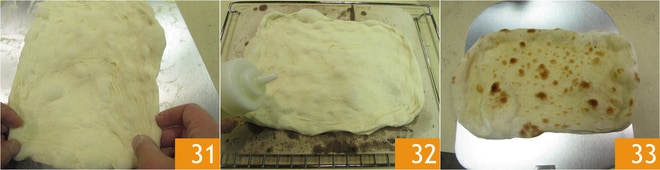
Transfer to a peel lightly sprinkled with semolina and shape it further into an oval, about 13-14 inches long and 8-9 inches wide 31. Bake for about 7-8 minutes in grill mode at maximum power, placing the pinsa on the baking stone 32: this is the pre-cooking 33.
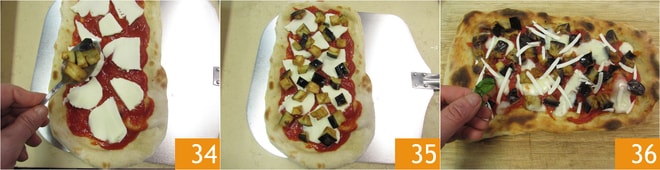
Top your pinsas as you like. For the "parmigiana" topping, add the tomato sauce first, then mozzarella slices, then fried eggplants 34 35, and then bake again for 2-3 minutes still in grill mode, until the mozzarella melts (adjust the time according to your oven if necessary). Finish with grated ricotta and basil leaves 36. Serve your Roman pinsa.