
Long Fermentation Pizza
The long fermentation pizza is made with a dough that rests for more than 24 hours. The result will be a light, fragrant, and digestible pizza!
- Average
- 1 h 25 min

There are dishes born from intuition and imagination, like pinsa or the classic amatriciana with its original recipe, and others by pure chance. One of these is Roman white pizza! It is said that this leavened product, a staple of Roman gastronomy, was born out of the bakers' need to check the oven temperature for baking bread. They used a small piece of dough to test the heat, which later became the Roman white pizza we know today! It is not a focaccia, nor a pizza; its aroma teases the taste buds cheering at the first taste because it is one of those doughs capable of capturing all the authentic flavors of tradition. We invite you to try our homemade version! You'll be won over by the crispy surface and airy interior, either on its own or filled with mortadella, which as they would say in Rome, is 'its perfect match'!
And if you are a fan of leavened products, also try:
Discover more delicious Pizza recipes and elevate your cooking game!
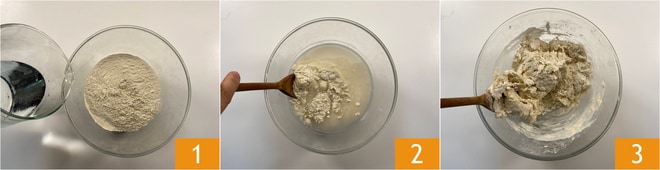
To make Roman white pizza, the water should be very cold: we recommend placing it in the fridge beforehand. Pour the flour into a bowl, add about 2 2/3 cups (650ml) of cold water 1 and start mixing slowly with a wooden spoon to hydrate all the flour. You will get a very coarse dough 3.
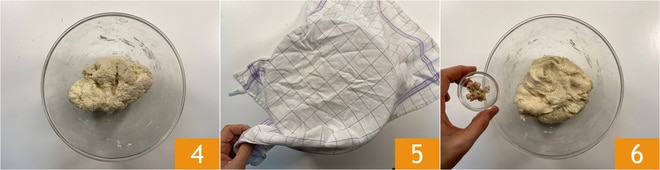
This first dough of only water and flour 4 can rest for 30 minutes covered with a cloth 5. Through autolysis, without the need for kneading, the gluten network will start to form. After 30 minutes, add the crumbled fresh yeast 6.
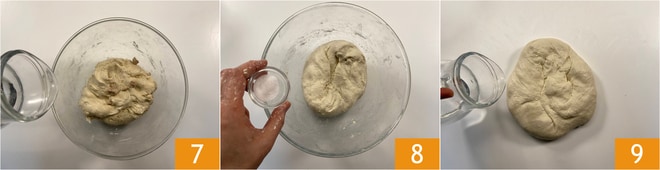
Pour almost all the remaining cold water from the fridge very slowly, little by little 7: it is important to add it slowly, otherwise the dough would be impossible to work with. Add the salt and incorporate it well into the dough so it absorbs 8. You can also transfer the dough to the workbench and finish adding the remaining cold water from the fridge, always very slowly 9. Knead again.
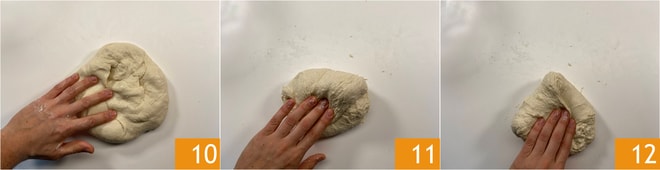
After absorbing the water 10, the dough will be rather sticky and difficult to work with, but do not add more flour. Instead, perform some 'slap&fold' folds: take the dough with both hands, lift it and slap it onto the workbench, turn it and repeat the operations 3-4 times 11 12.

Once you have a smooth ball, you can put it back in the bowl and let it rest for 10 minutes, covered with a cloth. At this point, you can start the bowl folds: slightly moisten your hands, then take an edge of the dough 13 and bring it to the center 14, repeating the operation 4 times around the perimeter of the dough 15.
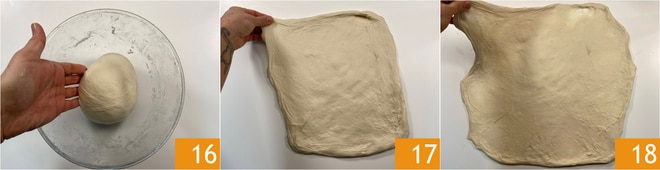
You should obtain a ball tucked into itself; flip it so the seam is always at the bottom 16. Repeat this same operation 3 times, 5-10 minutes apart between each folding round: in the end, you should have a well-strengthened dough. Finally, perform the lamination of the dough: slightly moisten your hands and the workbench, turn the dough onto the bench again, and spread it as much as possible until you get a very thin rectangle 17, you should be able to see through the dough 18.
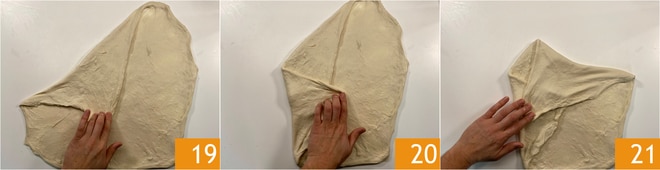
Then fold it by bringing the edges towards the center, like a handkerchief 19 20 21.
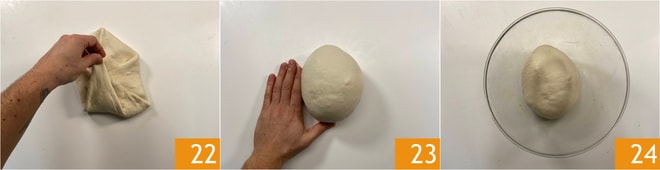
When you have brought all the edges to the center 22, flip the dough so the seam is in contact with the workbench and proceed with the pirlatura to seal the seam well 23. Let it rise in the bowl at room temperature for one hour 24, covered with plastic wrap. After this time, place it in the fridge for 24 hours.
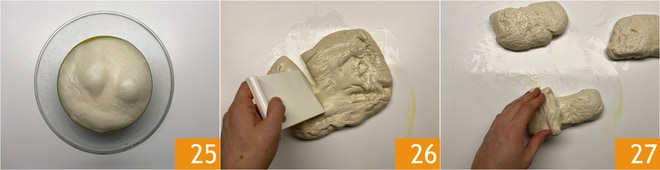
After 24 hours, take the dough out of the fridge 25, turn it onto the workbench and cut out 6 pieces of about 9.9 oz (280g) each 26. Shape each piece into a rectangle 27.
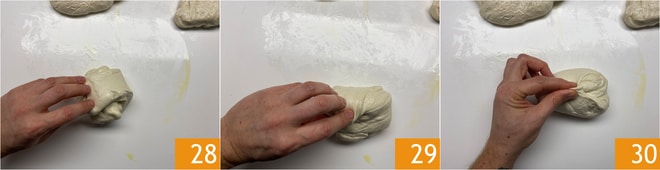
Without working the dough too much, make folds 28 until you form well-sealed balls 29; to close them well, you should pinch the seam 30.
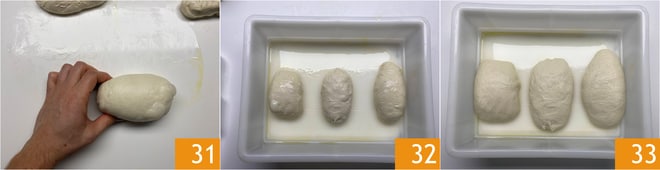
Always place the seam in contact with the workbench 31, make rotating movements bringing the dough towards you on the bench to seal it even better. Let the dough balls rest for 90 minutes in a well-oiled container, also oiled on the surface with the seam facing down. They should double in volume 33.
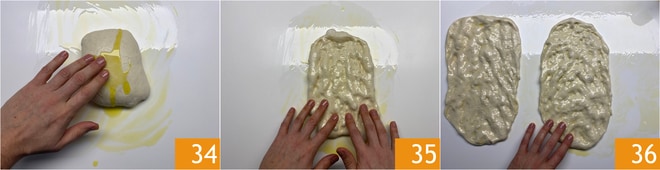
In the meantime, preheat the oven to the maximum power with a pan positioned upside down, so its base heats up perfectly. Now for the baking: spread each dough ball with plenty of oil on the workbench and surface 34. Spread by gently pulling the edges and pressing the dough with your index, middle, and ring finger along its length: you should create strips of dough 35. Sprinkle with salt flakes 36.
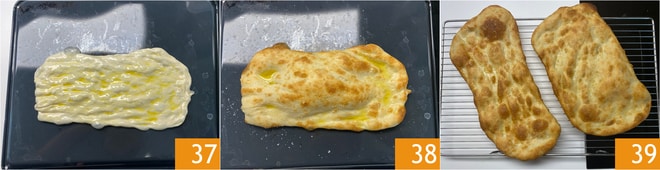
Lift gently and place on the heated pan 37. Drizzle more oil on the surface, bake at the maximum power of your oven, in static mode. After about 8 minutes, take the white pizza out of the oven 38. Transfer it to the oven rack and bake for another 3 minutes at maximum power 39, this time in fan mode: this way it will be beautifully golden and crunchy. Remove from the oven and let it dry directly on the rack. Fill as desired or enjoy it as it is!