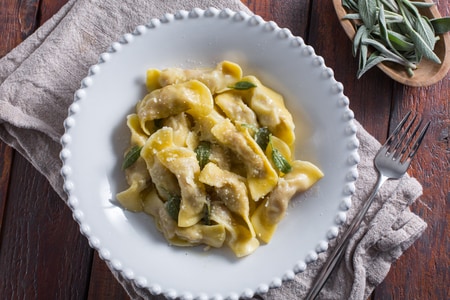

Ogliastra Culurgionis
Ogliastra culurgionis are a Sardinian first course: stuffed with potatoes, cheese, and mint, seasoned with simple tomato sauce! Find out how…
- Average
- 1 h 10 min
- Kcal 171
Cheese and honey, a refined and irresistible combination that reveals the secret to the success of an ancient Sardinian recipe: seadas, the famous fried pastries made with a dough that encloses a soft and tasty heart of cheese. A filling that honors the typical flavors of the island, with its tangy taste that perfectly blends with lemon zest, giving that fresh touch that distinguishes this dessert. This recipe traverses all of Sardinia, taking different names from place to place: sevada, sabada, casgiulata, seada, seatta. A variety of names believed to derive from the word seu which in Sardinian means animal fat, still used today in the dough of these tasty bites. Traditionally, seadas are enjoyed hot, garnished with local honey or powdered sugar. Between sweet and salty, seadas encapsulate a unique experience of aromas, scents, and flavors. Discover how to prepare them with chef Roberto Paddeu!
Here are other Sardinian recipes not to be missed:

To prepare the seadas, remember to take the cheese out of the fridge the same day you start making the dough, as the cheese needs to reach the right level of acidity for about 24 hours. First, prepare the pasta violada (or violata): in the bowl of a stand mixer, pour the semolina, all-purpose flour 1, sugar 2, and salt 3.
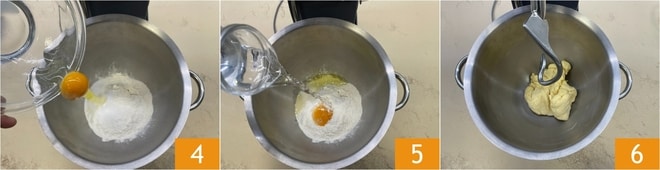
Also add the egg 4 and the water 5. Start kneading at low speed until you get a homogeneous and uniform mixture 6. It will take about 15 minutes.
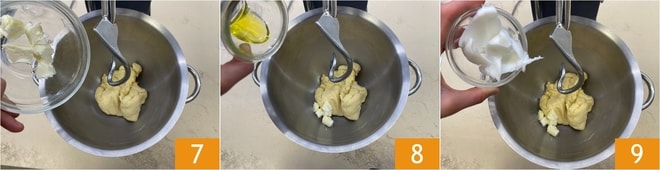
At this point, add the fats: butter 7, extra virgin olive oil 8, and lard 9.
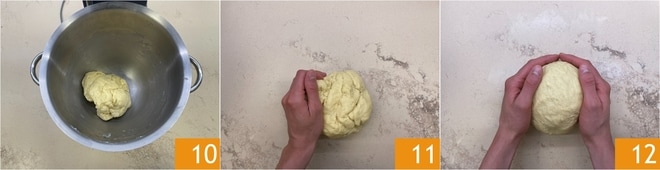
Knead for another 5 minutes 10, then transfer to a work surface and knead with your hands 11. Form a ball 12.
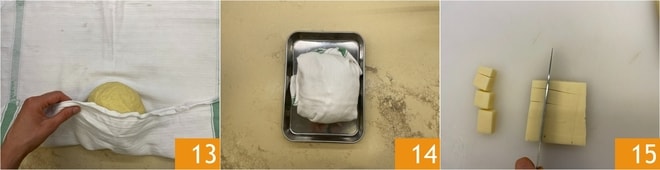
Wrap it in a towel 13 and let it rest for 24 hours in the refrigerator 14. The next day, take the cheese you had left out of the fridge for 24 hours and cut it into cubes 15.
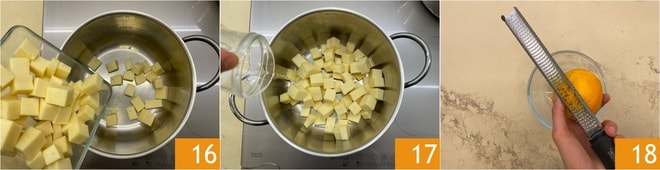
Place it in a saucepan over very low heat 16 and add a splash of water 17. Let it melt and in the meantime grate the orange zest 18.
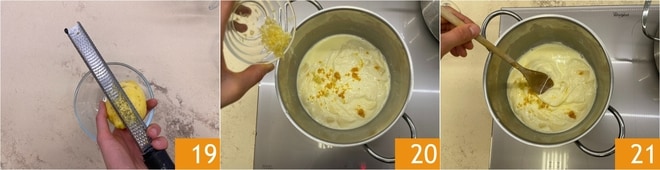
Also, grate the lemon zest 19. Stir occasionally with a wooden spoon, and when it is almost completely melted, add the lemon and orange zest 20. Stir again to let the flavors mix well 21.
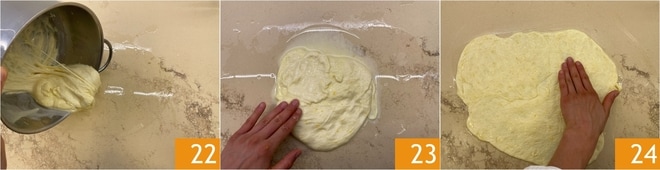
When the cheese is very stringy, transfer it to a surface moistened with water 22. Wet your hands well and gently press the cheese 23 until you get a thickness of about 1/4 inch 24.
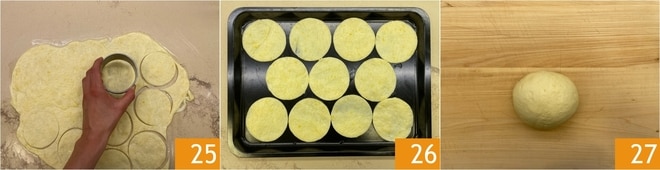
Let the cheese solidify for a few minutes, then use a 8-inch cookie cutter to cut out disks 25 and place them on a baking sheet 26. The scraps can be remelted as done previously and used to make other disks. You can store the disks in the fridge until ready to use.
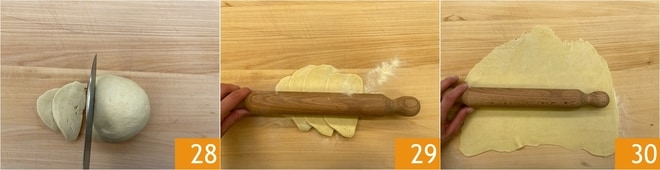
Take the dough and cut it into slices with a knife 28. Place some next to each other, sprinkle with semolina 29, and roll out the dough with a rolling pin until it is about 1/25 inch thick 30. You can fold the dough over itself to get a more uniform result.
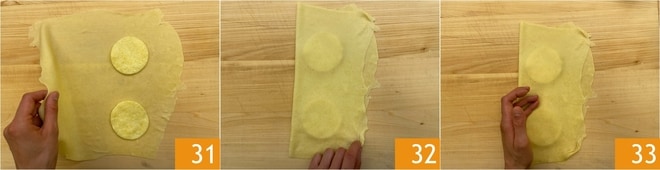
Place a couple of cheese disks on the dough 31, depending on the length of the dough. Then fold the dough to fully cover the disks 32 and press lightly around the cheese with your hand to let the air out 33.
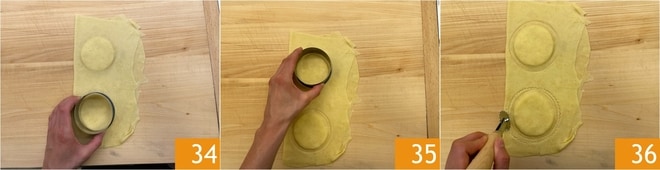
Take a 4-inch cookie cutter and gently press it with the smaller part to give it some shape without cutting it 34, then flip it and mark the shape using the larger part 35. Finally, cut the circumference using a cutter wheel 36.
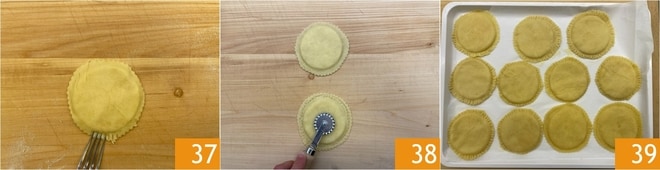
Seal the edge with the cutter wheel or with the prongs of a fork 37. If you prefer, decorate the center as well 38. Continue this way until all are formed 39.
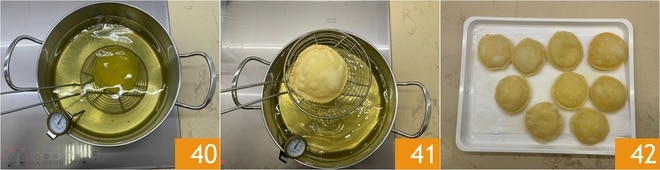
Heat plenty of vegetable oil to 265-285°F at most and immerse 1 seadas at a time so as not to lower the oil temperature too much. Cook it using a spoon to baste it with the hot oil. When it is well puffed and golden, drain it 41. Continue this way, draining the seadas on a tray lined with paper towels 42.
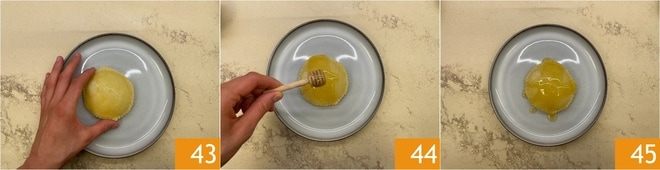
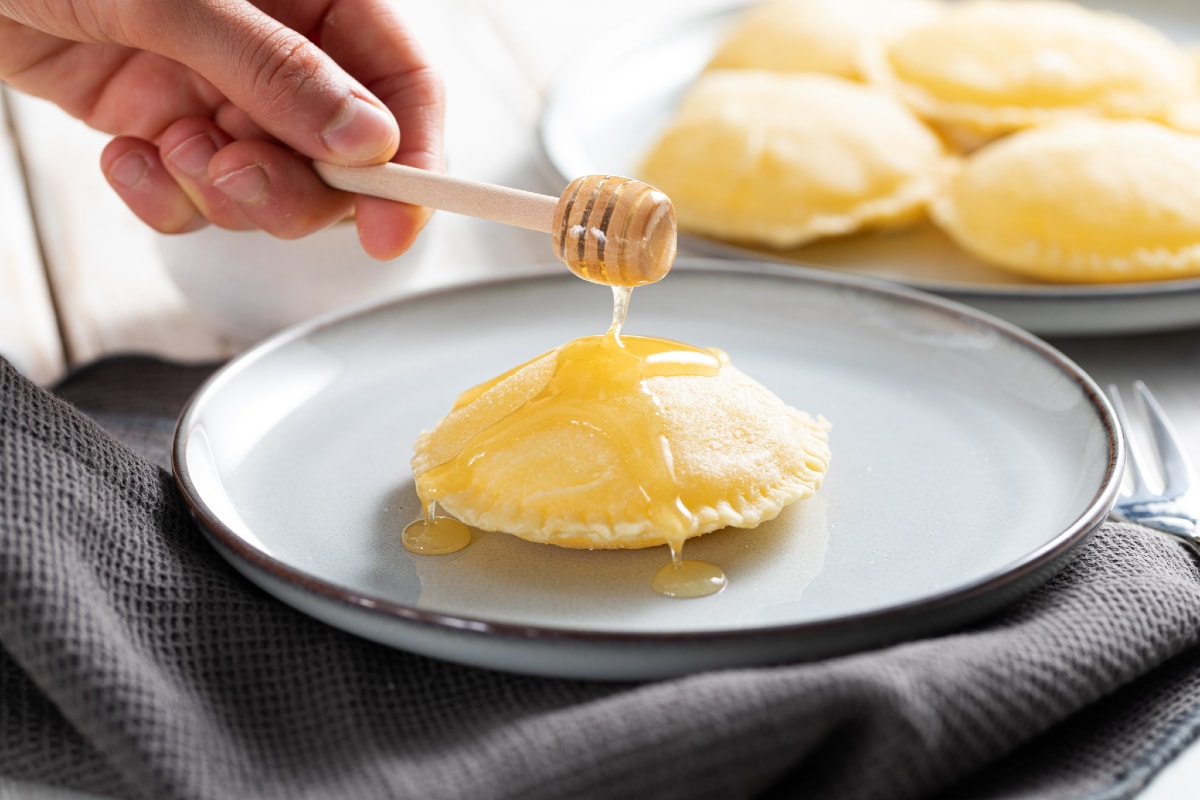
It is time to serve the hot seadas: place the first on a plate 44, decorate it with honey 44, and enjoy 45!