Roman Pinsa
Roman pinsa, a wonderful and appetizing invention: not a focaccia, not a pizza, but a unique leavened product. Discover how to prepare it!
- Difficult
- 60 min
- Kcal 305
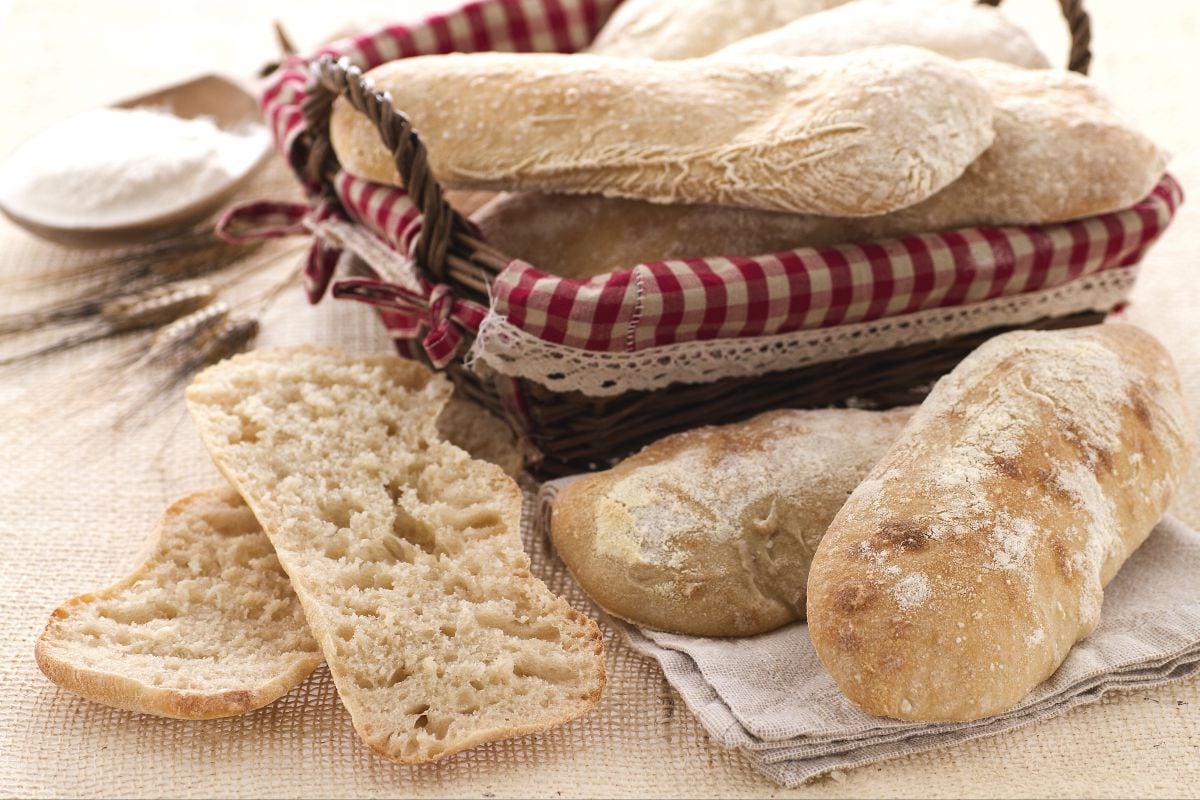
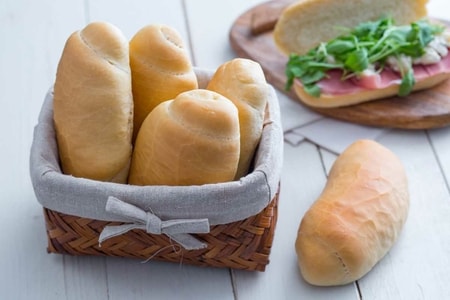
Ciabatta is an Italian bread, specifically from the Veneto region, with a golden crispy crust on the outside and a very airy crumb on the inside.
The typical flat and elongated shape of this bread resembles a slipper, hence its name.
The ciabatta dough is characterized by high hydration: it starts with a water-rich yeast known in baking terms as poolish, which is left to mature for three hours and then serves as a base for a second dough, which is also very soft. The dough is then folded, divided into loaves, elongated, and baked in the oven.
The ciabatta bread recipe was created in 1982 in the province of Rovigo, in the town of Adria, thanks to the ideas and experiments of a baker, Arnaldo Cavallari, together with Francesco Favaron, an already established baker who also associated this soft bread's shape to a "savata" (slipper in dialect). From Veneto, the ciabatta spread all over the world, where it is used as a base for rich and delicious sandwiches.
Today we will explain how to prepare ciabatta at home using a simple recipe freely inspired by the book "Il pane" by Piergiorgio Giorilli.
All that's left is to try making the ciabatta and then devouring it filled with either cold cuts or homemade sweet jam!
Does the poolish technique intrigue you? Try it also in the recipe for oil rolls.
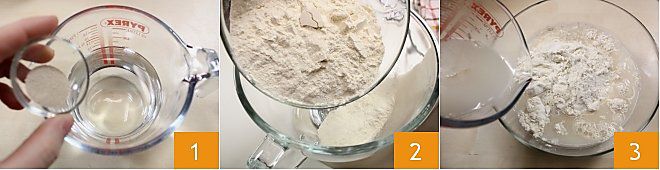
To prepare the ciabatta, start by kneading the poolish, a highly hydrated pre-ferment: dissolve the dry yeast in the water (alternatively, you can use 0.21 oz of fresh yeast) 1; in a bowl, mix the two sifted flours 2, the all-purpose and the bread flour, then combine everything by pouring the liquid slowly over the flours 3.
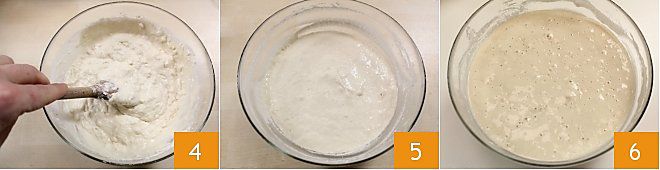
Mix well with a wooden spoon 4 until you obtain a homogeneous, smooth, and very soft dough 5. Cover the dough with plastic wrap and let it rise for about 3 hours at room temperature. After three hours, the poolish will appear more swollen, full of bubbles, and slightly darker in color 6.

You can now proceed with the second dough: dissolve the dry yeast (alternatively, you can use 0.32 oz of fresh yeast) and the malt (alternatively, you can use sugar) in the water (7-8), mix the sifted flours together and pour the poolish into the bowl of a stand mixer, equipped with the paddle attachment 9. If you don't have one, you can knead in a bowl, first using a spoon and then, once all the ingredients are gathered, continue by hand.
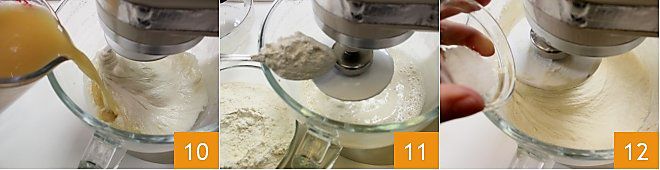
While the stand mixer is running at medium speed, add both the liquid and the flours alternately (10-11), until they are all used up. When all the ingredients are gathered around the paddle, clean it and replace it with the dough hook. Continue kneading for 5 minutes, add the salt 12 and continue for another 5-7 minutes, until the dough wraps around the hook.
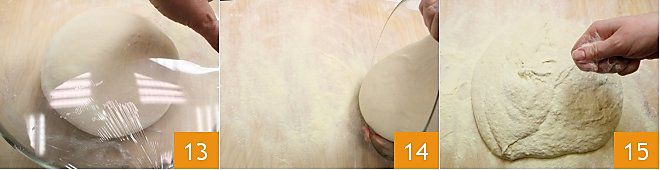
At that point, detach it and transfer it to a bowl (or leave it directly in the bowl used), cover it with plastic wrap and let it rest for 1 hour at room temperature, ideally between 75°F and 77°F 13. After this time, turn the dough onto a work surface dusted with plenty of semolina flour 14. Also, dust the surface with semolina 15 and
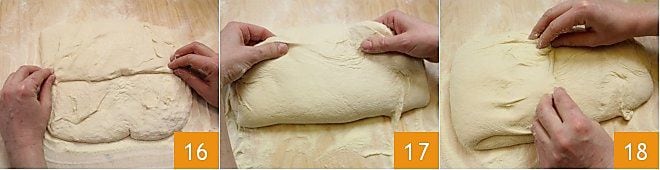
proceed by making the folds necessary for proving: bring the dough forward 16, then fold the lower part over the upper part 17 and then fold from one side 18 and
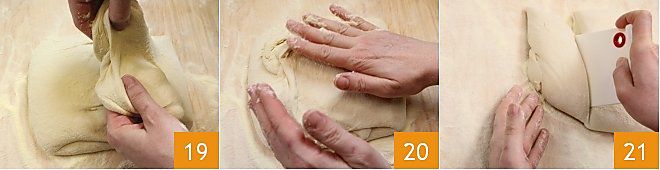
the other 19. Slightly flatten the dough 20 and divide it into about 10 pieces, each weighing approximately 5-5.5 oz 21.
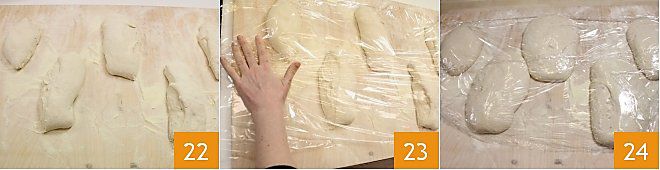
Let the dough balls rise on a well-floured surface with semolina, making sure to place them with the cut side up 22. Sprinkle them with semolina flour, cover them with plastic wrap to prevent the dough surface from drying out 23, and leave them for at least 1 to 1.5 hours in a warm environment (about 80°F). After this time, the dough balls will double in size 24.
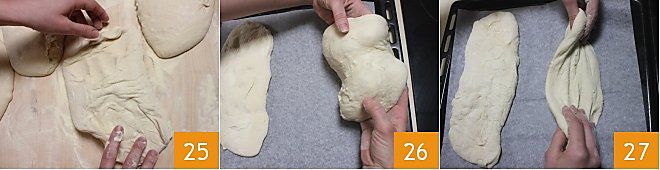
Now take one dough ball at a time, flip it over 25, and immediately transfer it to a preheated baking sheet in the oven covered with baking paper 26. Stretch the dough gently, pulling it delicately, to prevent the gases from escaping 27.

and bake them in a preheated static oven at 465-482°F (if fan-assisted, 428-446°F) 28: before closing the oven, spray 5-6 times with water using a spray bottle to create a warm and humid environment, which will prevent the crust from forming immediately and develop the crumb instead. Baking is the most delicate phase: for the first 8 minutes, the ciabatta should bake at 240-250°C. After the first 8 minutes, lower the temperature to 392°F (if fan-assisted, 356°F) and bake for another 8 minutes. Continue baking for the last 3-4 minutes, keeping the oven ajar with a wooden spoon wedged in the opening to create a vent, allowing the excess steam to escape, so as to promote the final baking of the crust and achieve a crispy texture. Finally, let your ciabatta cool 30 and they're ready to be devoured!