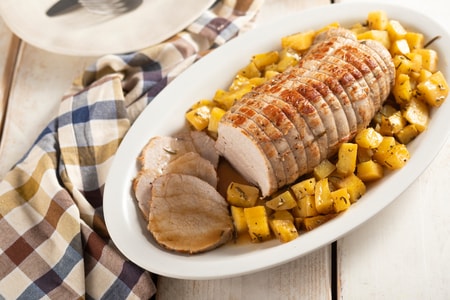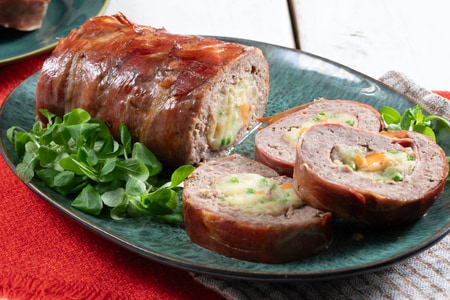
Rabbit Roll
The rabbit roll is a tasty main course. A rabbit roast, wrapped in bacon and stuffed with minced meat for all occasions!
- Average
- 1 h 50 min
A good roast starts with perfectly tying the meat. But how do you tie a roast? It's a procedure that can be done in various ways and for different reasons. We'll show you step by step how to do it, with the most common methods: the first is using a single string, ideal for maintaining the shape of the meat during cooking, securing herbs, and ensuring that the meat wrapped with bacon or lard holds well during cooking. The second involves multiple separate strings, even easier and particularly suitable for meat rolls; this method keeps the roll together and allows for portioning by removing the string as you go. We recommend using a linen string, perfect because it's made of natural fiber and can withstand high temperatures. Once you've mastered all the secrets of these techniques, you can try our delicious roast recipes:
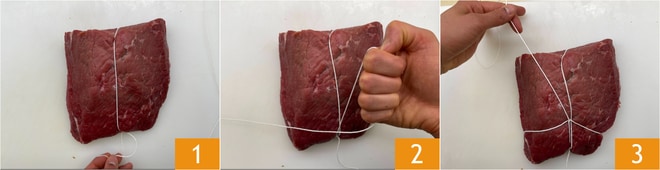
To tie the roast with a single string, slide the string under the piece of meat, then make a double knot at one end of the meat 1 2 and tighten well 3.
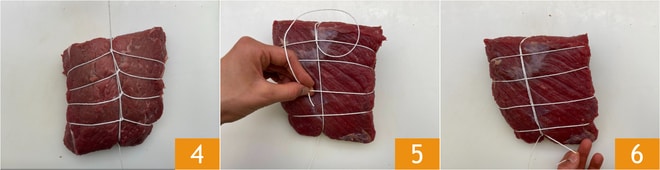
Then make two loops with the string around your hand to create a small loop, slide it along the meat and position it towards the end, near the first knot you made. Tighten well by pulling the loop, then proceed to create the cage, making another double loop of string around your hand to create the loop, and passing the loop along the entire meat, close to the first loop, always tightening well. Continue like this for the whole piece 4. At the last loop, turn the meat and cut the string, leaving it longer than the piece of meat, and pass it between the loops, alternating one yes and one no 5. Pull the string tightly and secure it with a double knot at the end 6.
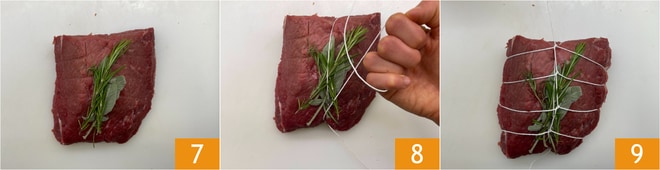
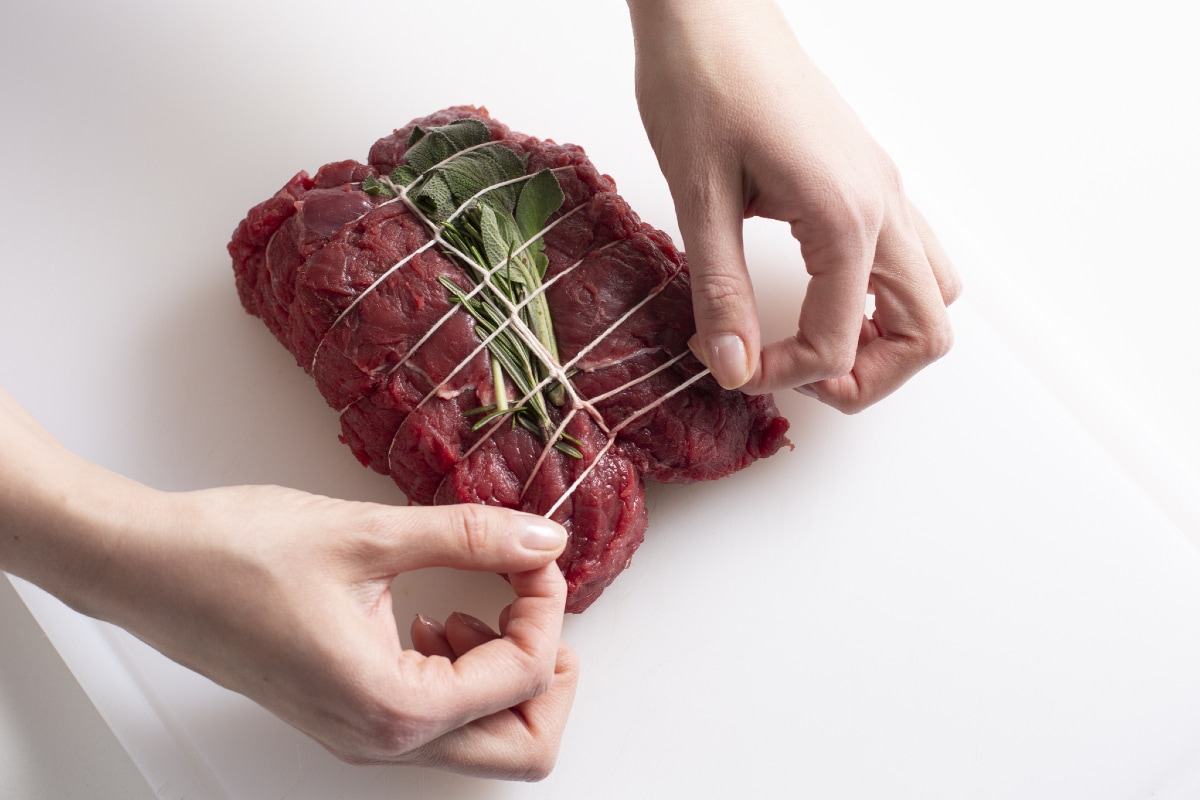
Place the meat on the cutting board, arrange the herbs 7, now proceed with the classic single string tie as described in the previous box, creating loops on the long side of the meat piece 8 to hold the herbs firmly 9.
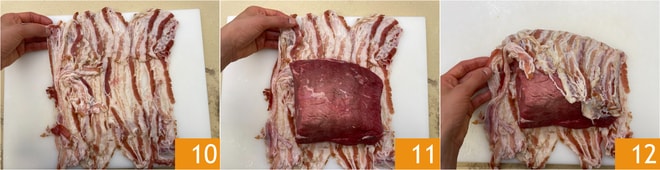
The method of wrapping is usually used for leaner pieces of meat, using fatty cured meats like lard or bacon. We used bacon to wrap the beef rump. Lay the slices of bacon on a cutting board, slightly overlapping them 10. Place the rump in the center 11, wrap it completely with the slices of bacon 12.
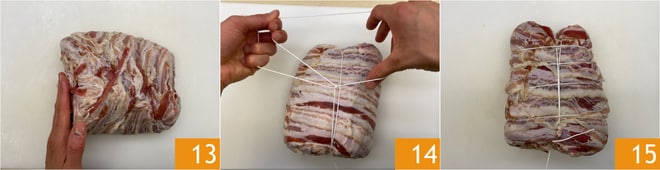
The most convenient way to arrange the slices of cured meat is horizontally to the meat, so with the piece of meat vertically in front of you, the cured meat will be horizontal. This arrangement can change depending on the type of meat and its size, the type of cured meat, and the length of the slices. At this point 13 proceed with the single string tie creating loops along the entire length of the meat, as previously explained 14. Once finished, turn the meat, cut the string leaving it longer than the piece of meat to make the final knot always tightly 15.
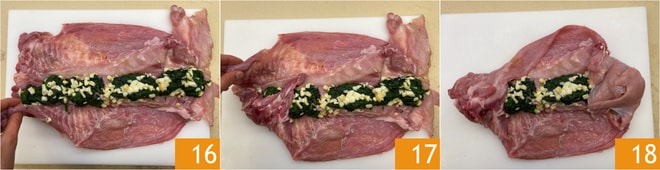
In the case of a roll, the technique of multiple string ties is used, so you can remove the string as the preparation is portioned. Proceed by laying the meat on a cutting board, in this case, we used rabbit. Distribute the filling in the center 16. Fold the ends towards the center 17 18.

Then lift one side over the filling 19 and close with the other side to seal it 20. At this point, cut pieces of string slightly longer than the circumference of the roll. The first string will be used to secure the center with a double knot 21.

Secure one end 22 and then the other 23, this way the filling will be evenly distributed. Now proceed by securing another 5/6 pieces of string, as many as the portions to be cut after cooking.